
Working in a continuous spiral is one of the most common construction methods in crochet, especially for amigurumi and other rounded projects, but it comes with a specific challenge that joined rounds don’t have: there’s no natural stopping point to reset your bearings. Lose track of where a round begins, and the whole piece can drift off course before you notice. This guide covers how spiral construction actually works, building on our guide on counting crochet stitches without losing your place.
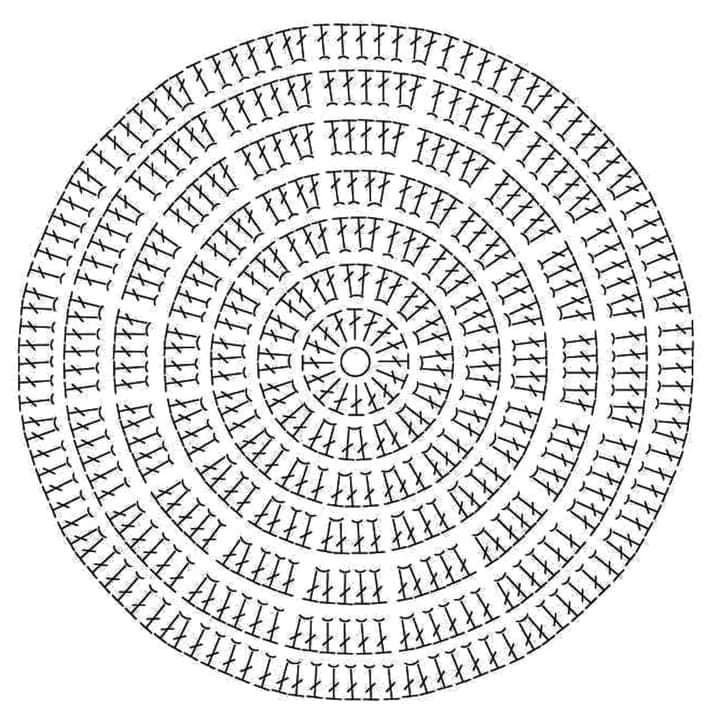
What “Working in a Spiral” Actually Means
Unlike a joined round, where you slip stitch into the first stitch to close each round before starting the next, spiral crochet simply continues forward without ever closing the loop. Each round blends directly into the next in one uninterrupted line, which is part of why it produces such a smooth, seamless result for rounded shapes. The tradeoff is that without a joining stitch marking the boundary, it’s entirely up to you to track where one round technically ends and the next begins.
Why Spiral Construction Is Popular for Certain Projects
Joined rounds create a visible seam line where the slip stitch closes each round, which can be a deliberate design choice in some patterns but is often undesirable for projects meant to look perfectly smooth, like amigurumi heads or bodies. Spiral construction avoids that seam entirely, at the cost of needing more deliberate tracking to stay oriented.
The Core Tool: A Stitch Marker at the Round’s Start
The single most important habit for spiral crochet is placing a stitch marker into the very first stitch of each round and moving it forward every time you complete a full round. Without this marker, there’s genuinely no reliable way to know exactly where a round started once you’re several stitches into the next one, since the fabric itself gives no visual cue.
How to use it practically: Insert the marker into the first stitch of a new round as soon as you work it. When you’ve worked all the way around and are about to start the next round, remove the marker from that stitch and place it into the new first stitch, repeating this process every single round, a technique also referenced in general stitch-marker guidance from the Craft Yarn Council.
Counting Stitches to Confirm You’re Still on Track
Beyond the marker, counting your total stitches at the end of every round and comparing that number to what your pattern expects is the second essential habit. Since increases and decreases in spiral projects like amigurumi change your expected count round by round, checking against the pattern’s stated count catches drift immediately rather than several rounds later.
What Happens When You Lose the Spiral
If you genuinely lose track of where a round starts, either because a marker fell out or you simply lost focus, a few recovery approaches can help. Count backward from your current position by your total round stitch count to estimate where the round likely started, then look closely at the fabric for any visual cues, like a slight shift in stitch height if you’re mid-shaping, that might confirm the boundary. If you truly can’t determine the round boundary with confidence, placing a new marker at your best estimate and continuing forward, accepting a small amount of uncertainty, is usually more practical than unraveling back to a point of certainty.
Spiral Construction Versus Joined Rounds: When to Use Which
Spiral rounds suit projects wanting a seamless look, like most amigurumi bodies, hats worked without a visible seam, or any rounded shape where a joining line would be visually distracting.
Joined rounds suit projects where a deliberate stopping point helps, such as patterns with distinct color changes at the start of each round, or granny-square-style motifs where a clean, defined round boundary is part of the design.
Keeping Increases and Decreases Aligned in a Spiral
Since spiral construction has no joining point to reset visual alignment, increases and decreases in later rounds can drift out of alignment with earlier rounds if not tracked carefully. Many amigurumi patterns specifically design increase and decrease placement to shift slightly between rounds on purpose, avoiding a visible seam-like line of stacked increases, so don’t assume increases should always line up directly on top of each other unless your specific pattern says so.
Common Mistakes to Avoid
- Working several rounds without a stitch marker, assuming you’ll remember where each round started.
- Forgetting to move the marker forward each round, leaving it several rounds behind your actual current position.
- Not counting stitches at the end of every round, allowing gradual drift to go unnoticed for an extended stretch.
- Assuming increases must always stack directly above previous increases, when many patterns intentionally offset them.
Tips for Better Results
- Move your stitch marker as an automatic first step every time you complete a round, before starting the next stitch.
- Count your total stitches immediately after moving the marker, making the two habits part of the same consistent routine.
- If you set a spiral project down for an extended break, double-check your marker placement and stitch count before resuming, since it’s easy to lose your bearings after time away.
- Use two different colored markers if your pattern requires tracking both the round start and a specific increase or decrease point simultaneously.
Frequently Asked Questions
Is spiral crochet harder to learn than joined rounds? It’s not inherently more difficult technically, but it does require more consistent tracking habits since there’s no natural stopping point built into the structure itself. Most crocheters find it becomes second nature fairly quickly with a marker habit in place.
Can I switch a pattern written for joined rounds into a spiral, or vice versa? It’s possible, though it usually requires adjusting your stitch count expectations slightly, since joined rounds typically include a turning or joining chain that spiral rounds don’t need in the same way.
What if I genuinely can’t tell where my current round started? Counting backward by your expected stitches-per-round from your current position, combined with a close visual inspection for any subtle structural cues, is the most practical way to make a reasonable estimate and continue forward.
Do all amigurumi patterns use spiral construction? Most do, specifically to avoid a visible seam in the finished piece, though some patterns do use joined rounds intentionally, particularly for pieces with color changes tied to specific round boundaries.
Is it normal for increases to be offset between rounds rather than stacked directly on top of each other? Yes, this is a common and often intentional design choice in spiral patterns, helping distribute shaping more evenly around the piece and avoiding a visually obvious line where increases would otherwise stack.